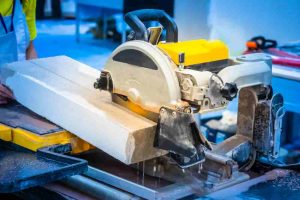
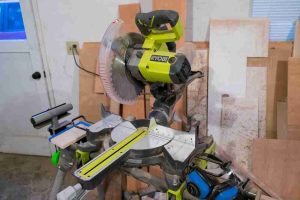
A chop saw, often referred to as a miter saw, is a powerful tool designed for making precise crosscuts and miter cuts in various materials like wood, metal, and plastic. Whether you’re a professional contractor or a DIY enthusiast, a chop saw is essential for achieving clean and accurate cuts, making it invaluable for projects ranging from furniture building to framing and trim work.
Knowing how to unlock a chop saw safely and effectively is crucial for several reasons. First and foremost, it ensures your safety while operating the tool. An improperly unlocked saw can lead to accidents or injuries. Additionally, understanding the unlocking mechanism allows for smoother operation and extends the lifespan of the saw. In this guide, we’ll walk you through the steps to unlocking miter saw, ensuring you’re well-equipped to handle your projects with confidence and care.
Understanding Your Chop Saw
Types of Chop Saws
Chop saws come in several types, each designed for specific cutting tasks. Understanding the differences can help you choose the right tool for your needs and know how to unlock it properly.
- Miter Saws: These are commonly used for making angled cuts. They typically have a fixed base and a pivoting arm that allows the blade to cut at various angles, making them ideal for trim work, molding, and framing.
- Sliding Compound Miter Saws: These are an advanced version of standard miter saws. They feature a sliding arm that enables the blade to move back and forth, allowing for wider cuts. This versatility makes them suitable for larger pieces of material and complex angles.
Knowing your specific model is essential for understanding its unique features and unlocking mechanism. Each type may have different methods for securing and unlocking the blade, so familiarizing yourself with your model will enhance safety and efficiency.
Components of a Chop Saw
A chop saw consists of several key parts that are crucial for its operation and safety:
- Blade: The cutting component of the saw, which comes in various sizes and tooth configurations depending on the material being cut.
- Fence: A guide that helps align the material being cut, ensuring accurate and consistent cuts.
- Trigger: The mechanism that powers the saw. It must be engaged for the saw to operate.
- Locking Mechanism: This feature keeps the blade in a safe position when the saw is not in use. It can be a lever, button, or pin, depending on the model.
Understanding these components is vital for safely unlocking the chop saw. Each part plays a role in the saw’s functionality, and knowing how they work together will help you operate the tool more effectively and avoid potential hazards.
Safety Precautions
By following these safety precautions, you can create a safer working environment, reducing the risk of accidents and injuries while using your chop saw.
Wear Appropriate Safety Gear
Before operating a chop saw, it’s crucial to protect yourself with the right safety gear. This not only minimizes the risk of injury but also enhances your overall safety while using the tool. Here are the recommended items:
- Safety Goggles: Protect your eyes from flying debris and dust generated during cutting. Choose goggles that fit snugly and provide adequate coverage.
- Cut-Resistant Gloves: While handling materials, wear gloves that provide a good grip and protection against sharp edges. Avoid loose-fitting gloves that could get caught in the saw.
- Hearing Protection: Chop saws can be loud, so using earplugs or earmuffs can help protect your hearing during extended use.
Workspace Preparation
A well-prepared workspace is essential for safe chop saw operation. Here are key steps to ensure your area is safe:
- Clear the Area of Debris and Obstacles: Before starting your project, remove any clutter, tools, or materials that could pose a tripping hazard. This helps maintain a safe environment and allows for easy movement around the saw.
- Ensure Proper Lighting and Ventilation: Good lighting is vital for seeing your work clearly and accurately. If you’re working indoors, ensure the area is well-lit. Additionally, adequate ventilation helps dissipate any dust or fumes, especially when cutting materials that may produce harmful particles.
How to Unlock a Chop Saw
By following these steps and troubleshooting tips, you can unlock your chop saw safely and ensure it operates smoothly for your cutting tasks.
Identify the Locking Mechanism
Before unlocking your chop saw, it’s essential to know the type of locking mechanism it employs. Most chop saws feature one of the following common mechanisms:
- Lever Lock: This mechanism typically involves a lever that you can flip or push to release the blade. It’s often located on the handle or near the base of the saw.
- Button Lock: A button lock requires you to press a button to disengage the locking mechanism. This is usually found on the saw’s body and may be labeled for easy identification.
- Blade Lock: The blade lock is usually positioned near the blade guard or on the side of the motor housing. It may have markings or be labeled for easy identification.
Step-by-Step Instructions
Follow these steps to unlock your chop saw safely and effectively:
- Step 1: Ensure the Saw is Unplugged
For electric models, safety is paramount. Always unplug the saw before attempting to unlock it. This prevents accidental activation. - Step 2: Locate the Locking Mechanism
Examine your saw to find the locking mechanism. Refer to your user manual if you’re unsure, as different models may have different locations. - Step 3: Apply the Unlocking Method
Depending on your saw’s mechanism:- If it’s a lever lock, flip or push the lever to release the blade.
- If it’s a button lock, press the button firmly until you hear a click or feel it disengage.
- Step 4: Test the Blade’s Movement for a Full Unlock
Gently pull the blade down to ensure it moves freely. If it does, you have successfully unlocked the saw.
Troubleshooting Common Issues
Sometimes, you may encounter issues while trying to unlock your chop saw. Here are some troubleshooting tips:
- What to Do if the Lock Doesn’t Release:
If the lock doesn’t disengage, double-check that you’re following the correct procedure for your specific model. Ensure that the saw is unplugged and that you’re applying adequate pressure. - Tips for Sticky Locks or Damaged Mechanisms:
- If the locking mechanism feels sticky, consider applying a small amount of lubricant (like WD-40) to the affected area. Allow it to sit for a few minutes before attempting to unlock it again.
- If the mechanism appears damaged or stuck, consult the user manual for your saw, or contact customer service for assistance. Avoid forcing the mechanism, as this can lead to further damage.
Maintenance Tips for Chop Saw Longevity
Regular Cleaning and Inspection
Maintaining your chop saw is essential for ensuring its longevity and performance. Regular cleaning and inspection help prevent buildup of dust and debris, which can affect cutting accuracy and efficiency. Here are some key points to consider:
- Blade Maintenance: Check the blade for signs of wear or damage. Clean the blade after each use to remove resin and pitch buildup, which can lead to poor cutting performance. Use a soft brush or a specialized blade cleaner to keep it sharp and effective.
- Component Inspection: Regularly inspect other components of the saw, such as the fence, base, and locking mechanism. Look for any signs of wear, rust, or damage that could impact performance. Addressing these issues early can prevent costly repairs down the line.
Lubrication Points
Proper lubrication is crucial for smooth operation and preventing wear on moving parts. Here’s where and how to lubricate your chop saw:
- Pivot Points: Locate the pivot points where the saw arm moves. Apply a few drops of machine oil or a silicone-based lubricant to these areas to ensure smooth movement.
- Sliding Mechanism: If your chop saw has a sliding mechanism, apply lubricant along the rails to prevent sticking and ensure easy movement.
- Locking Mechanism: Occasionally lubricate the locking mechanism to prevent it from becoming sticky or jammed. Make sure to wipe off any excess lubricant to avoid attracting dust and debris.
Storing Your Chop Saw
Proper storage practices can significantly extend the life of your chop saw. Consider these best practices for storing your tool:
- Clean Before Storing: Always clean the saw before storing it. Remove any dust, debris, or residue from the blade and body.
- Use a Protective Cover: If possible, use a cover to protect the saw from dust and moisture. This helps prevent rust and other damage.
- Store in a Dry, Cool Place: Keep your chop saw in a dry, temperature-controlled environment to avoid exposure to humidity, which can lead to rust and corrosion.
- Securely Position the Saw: Ensure that the saw is stored in a stable position to prevent it from falling or being knocked over. If using a stand, make sure it’s properly secured.
Conclusion
In summary, understanding how to unlock a chop saw and maintain your chop saw is crucial for both performance and safety. Proper unlocking techniques prevent accidents, while regular maintenance—such as cleaning, lubrication, and careful storage—ensures your tool remains reliable and effective for all your cutting projects.
By prioritizing safety and upkeep, you not only extend the lifespan of your chop saw but also enhance your overall woodworking experience. We encourage you to practice safe operation, adhere to maintenance routines, and always stay informed about the best practices for using your tools. Your diligence will lead to better results and a safer working environment. Happy cutting!


