In today’s world of power tools and CNC machines, the art of hand-cutting mortises might seem like a lost skill. Yet, this traditional woodworking technique remains invaluable for creating strong, beautiful joints that have stood the test of time.
Whether you’re a woodworking enthusiast looking to expand your skillset or a professional seeking to refine your craft, learning how to cut a mortise by hand connects you to centuries of woodworking tradition while producing results unmatched by machines.
Understanding the Mortise and Tenon Joint
Before diving into the process, it’s essential to understand what a mortise is and its role in woodworking. The mortise and tenon joint is one of the oldest and strongest woodworking joints known to humanity. It consists of two components: the mortise (a cavity or slot cut into a piece of wood) and the tenon (a corresponding projection cut on another piece that fits perfectly into the mortise).
This joint’s strength comes from its mechanical interlock and the large surface area available for glue adhesion. When properly executed, a mortise and tenon joint can last for generations, as evidenced by antique furniture that remains functional centuries after its creation.
Essential Tools for Hand-Cutting Mortises
To cut mortises by hand, you’ll need a specific set of tools. Investing in quality tools will make the process more enjoyable and yield better results:
- Mortise Chisels: Unlike standard bench chisels, mortise chisels are specifically designed for chopping out waste material. They feature thick, robust blades that can withstand heavy mallet blows and levering forces without bending.
- Mallet: A wooden or nylon mallet delivers the force needed to drive the chisel through the wood. A 16-20 oz mallet is ideal for most mortising work.
- Marking and Measuring Tools: A combination square, marking gauge, marking knife, and pencil are essential for accurate layout.
- Drill (Optional): While not necessary, a brace and bit or power drill can help remove waste material from larger mortises, saving time and effort.
- Clamps and Workbench: A sturdy workbench with proper clamping ensures your workpiece remains secure during the mortising process.
- Safety Equipment: Safety glasses and hearing protection are non-negotiable when working with hand tools.
Preparing Your Workspace and Materials
Proper preparation is key to successful hand-cut mortises:
- Select Your Wood: Choose stable, straight-grained wood for your first attempts. Hardwoods like oak, maple, or cherry work well, though softer woods like pine can be easier for beginners.
- Mark Your Mortise Location: Use your combination square and marking knife to outline the position precisely. A marking knife creates a more accurate line than a pencil, as it severs the wood fibers rather than just marking the surface.
- Set Your Marking Gauge: Adjust your marking gauge to the width of your mortise and scribe lines on both faces of the workpiece. This ensures your mortise walls will be parallel.
- Secure Your Workpiece: Clamp your workpiece firmly to your workbench. It should not move during the chopping process.
Step-by-Step Guide: How to Cut a Mortise By Hand
Step 1: Define the Mortise Ends
Start by positioning your mortise chisel (typically about 1/3 the width of your mortise) vertically at one end of your marked, with the bevel facing the waste material. Strike the chisel firmly with your mallet to define the end of the cut. Repeat this process at the other end.
Step 2: Remove Waste Material in Stages
Working from the center outward, begin removing waste material:
- Position your chisel about 1/8″ from one end, with the bevel facing up.
- Strike the chisel with your mallet to drive it into the wood.
- After driving the chisel about 1/4″ deep, lever it backward toward the previously cut end to break out the waste chip.
- Repeat this process along the length of the, working in increments.
- Continue this process, gradually deepening with each pass.
Step 3: Clean Up the Mortise Walls
Once you’ve removed most of the waste material, it’s time to refine the mortise walls:
- Use your chisel with the bevel facing against the wall you want to straighten.
- Take light paring cuts to smooth the walls and ensure they’re straight and square.
- Check your progress frequently with a square to ensure the walls remain perpendicular to the face.
Step 4: Check Depth and Finalize
Periodically check the depth of your cut with a depth gauge or by measuring from the edge. Once you’ve reached your desired depth, use a sharp chisel to clean up the bottom, making it as flat as possible.
Advanced Techniques for Precision Mortising
As you become more comfortable with basic mortising, you can incorporate these advanced techniques:
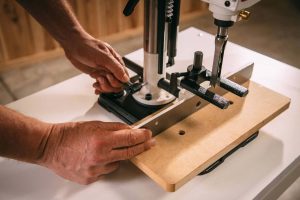
The “Drill and Chop” Method
For deeper or wider mortises, consider drilling out most of the waste first:
- Drill a series of overlapping holes within the outline, leaving about 1/16″ of material around the edges.
- Use your chisel to clean up the walls and corners, taking care not to go beyond your marked lines.
Tapered Mortises
For even stronger joints, consider cutting a slight taper (about 1-2 degrees) on the cutting walls, wider at the surface than at the bottom. This creates a wedging effect when the tenon is inserted and glued.
Stopped Mortises
For a more refined appearance, you can cut “stopped” mortises that don’t go all the way through the workpiece:
- Mark the desired depth on your chisel with masking tape.
- Work carefully, checking your depth frequently to avoid breaking through.
- Use a chisel the same width as the mortise for the final cleanup to ensure a flat bottom.
Common Mistakes and How to Avoid Them
Even experienced woodworkers encounter challenges when cutting by hand. Here are some common issues and their solutions:
Mortise Walls Aren’t Square
Cause: This often results from holding the chisel at an angle during chopping or paring.
Solution: Use a square to check your chisel’s position frequently. When paring, keep the chisel flat against a reference surface.
Mortise Is Too Wide
Cause: Levering the chisel too aggressively or using a chisel that’s too wide for the cut.
Solution: Start with a chisel about 1/3 the width of your mortise and work gradually. Avoid excessive levering force.
Splintering at the Mortise Edges
Cause: This typically happens when working across the grain or when the chisel isn’t sharp enough.
Solution: Keep your chisels razor-sharp. When working near the edges across the grain, make lighter cuts and support the wood fibers with your fingers or a block of wood.
Inconsistent Depth
Cause: Not checking depth frequently or working too quickly.
Solution: Mark your desired depth clearly and check your progress often. Consider using a depth stop on your chisel for consistency.
Maintaining Your Mortising Tools
Proper tool maintenance is crucial for successful hand-cutting:
- Keep Chisels Sharp: A sharp chisel is safer and more effective than a dull one. Learn to sharpen your chisels properly, maintaining the correct bevel angle.
- Protect the Edges: Store your chisels in a tool roll or rack where the edges won’t be damaged.
- Clean After Use: Remove any pitch or residue from your tools after each use to prevent buildup.
- Handle Care: Ensure your mallet handle is secure and in good condition. A loose head can be dangerous and imprecise.
The Satisfaction of Hand-Cut Joinery
Learning to cut mortises by hand is more than just acquiring a technical skill—it’s connecting with woodworking tradition and developing a deeper understanding of wood as a material. The rhythmic process of marking, chopping, and refining a mortise can be meditative, and the satisfaction of creating a perfectly fitting joint without power tools is unmatched.
As you practice this skill, you’ll develop an intuitive sense of how wood behaves, how tools interact with different grain patterns, and how to adjust your technique for various situations. This knowledge will serve you well in all your woodworking endeavors, whether you’re building furniture, framing structures, or creating decorative objects.
Conclusion
Cutting mortises by hand is a fundamental woodworking skill that, while challenging to master, offers immense rewards. The process requires patience, practice, and attention to detail, but the resulting joints are stronger, more beautiful, and more satisfying than those produced by machines.
Start with simple projects, practice regularly, and don’t be discouraged by initial imperfections. Each mortise you cut will teach you something new about wood, tools, and your capabilities. Over time, you’ll develop the confidence and skill to tackle more complex joinery, expanding your woodworking horizons and creating pieces that will stand the test of time.
Remember, in our fast-paced world of instant results, there’s profound value in slowing down and engaging in the deliberate, thoughtful process of hand-cut joinery. It’s not just about creating strong joints—it’s about preserving a craft, connecting with tradition, and finding joy in the process of creation.